The SV3C Camera is a versatile smart IP camera designed for home and outdoor security, offering HD video, night vision, motion detection, and two-way audio. Its user-friendly setup and compatibility with smartphones make it an ideal choice for modern surveillance needs.
Overview of the SV3C Camera Series
The SV3C Camera Series is a line of smart IP cameras designed for home and outdoor security surveillance. These cameras are known for their high-definition video quality, night vision capabilities, and motion detection features. The series includes models like the 5MP PTZ WiFi camera, which offers pan-tilt-zoom functionality and 20X optical zoom for enhanced monitoring. The cameras are compatible with the SV3C Cloud app, available for both iOS and Android, allowing users to stream live footage and receive alerts remotely. With a focus on user-friendly setup and robust security features, the SV3C Camera Series is a popular choice for modern home and business surveillance needs. The series also supports cloud storage and local recording options, ensuring flexible video management.
Key Features of the SV3C Camera
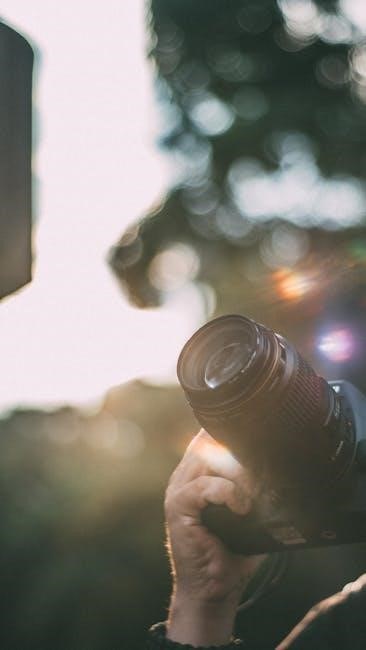
The SV3C Camera boasts an impressive array of features, including 5MP high-resolution video for crystal-clear imagery and 20x optical zoom for detailed surveillance. It supports PTZ (Pan-Tilt-Zoom) controls, allowing remote adjustment of viewing angles. Night vision with infrared LEDs ensures visibility up to 100ft in low-light conditions. The camera also features motion detection, sending alerts to your smartphone via the app. Two-way audio enables communication through the camera’s built-in microphone and speaker. Additionally, it offers cloud storage options for recording and storing footage securely. Weather-resistant design makes it suitable for outdoor use, and compatibility with both iOS and Android devices ensures seamless integration with your smartphone.
Installation and Setup
Installing the SV3C camera involves connecting it to a power source, downloading the app, and linking it to your WiFi network for seamless setup and operation.
Hardware Installation Guide
To install the SV3C camera, start by connecting the network cable to the router. For POE cameras, connect the Ethernet cable to the POE port on your router or switch. If your camera doesn’t support POE, use the provided power adapter to connect it to a power source. Mount the camera in your desired location, ensuring it is level and securely fastened. For outdoor use, choose a spot protected from direct weather exposure. Align the camera’s angle to cover the area you want to monitor. Finally, tighten all screws to ensure stability. Refer to the quick start guide or installation instructions on the SV3C website for detailed diagrams and step-by-step diagrams to ensure proper setup.
Software Setup and App Installation
To set up the SV3C camera, begin by downloading the SV3C Cloud app, available for both iOS and Android devices. Visit the App Store or Google Play Store, search for “SV3C Cloud,” and install the app. Alternatively, scan the QR code provided in the user manual or on the camera’s packaging to directly access the download link. Once installed, launch the app and create an account or log in if you already have one. Ensure your camera is powered on and within range of your Wi-Fi network. Follow the in-app instructions to connect the camera to your network and complete the initial setup. This process typically involves verifying the camera’s serial number and synchronizing it with your account. After successful setup, you can access live footage, adjust settings, and receive notifications through the app.
Connecting the Camera to the Network
To connect the SV3C camera to your network, start by ensuring the camera is powered on and within range of your Wi-Fi router. Use a network cable to connect the camera to your router for initial setup. Next, download and install the SV3C Cloud app on your smartphone. Open the app and follow the in-app instructions to add the camera to your network. If using Wi-Fi, select your network name and enter the password. Alternatively, you can scan the QR code on the camera using the app for quick pairing. Once connected, the camera will appear in the app, allowing you to access live footage and adjust settings. Ensure your router is functioning properly and restart the camera if you encounter connectivity issues.
Powering On and Initial Configuration
To power on the SV3C camera, connect it to a power source using the provided adapter. Ensure the camera is within range of your WiFi network. Once powered on, download and install the SV3C Cloud app on your smartphone. Open the app and create an account or log in if you already have one. To configure the camera, tap the “+” icon to add a new device. Scan the QR code on the camera’s base or manually enter the device ID. Follow the in-app instructions to connect the camera to your WiFi network. Once connected, you can access live footage, adjust settings, and customize notifications. This initial setup ensures your camera is ready for monitoring and recording.
Troubleshooting Common Setup Issues
During the setup of your SV3C camera, you may encounter issues such as connectivity problems or firmware updates. First, ensure the camera is properly powered and connected to your network. Check the Wi-Fi signal strength and verify that the camera is within range of your router. If the app fails to detect the camera, restart both the camera and your smartphone. For connectivity issues, reset the camera by pressing the reset button for 10 seconds. Additionally, ensure the latest firmware is installed, as outdated versions can cause malfunctions. If problems persist, refer to the user manual or visit the SV3C website for detailed troubleshooting guides and video tutorials.
Camera Features and Settings
The SV3C Camera offers 5MP PTZ functionality, 20X optical zoom, night vision, motion detection, and cloud storage. It supports two-way audio and adjustable video quality settings.
Video Quality and Resolution Settings
The SV3C camera offers high-definition video recording with adjustable resolution settings to suit various surveillance needs. Users can choose from multiple resolutions, including 720p, 1080p, and higher, ensuring clear footage. The camera supports video quality adjustments through the app, allowing users to optimize for clarity or bandwidth. Additionally, the camera features adaptive bitrate technology to maintain video stability in varying network conditions. For outdoor models, settings like wide dynamic range (WDR) enhance visibility in challenging lighting. Night vision mode automatically switches to infrared for clear low-light footage; Users can also customize video quality preferences in the app to balance detail and storage requirements, ensuring optimal performance for their specific security setup.
Night Vision and Infrared Settings
The SV3C camera features advanced night vision capabilities, enabling clear video recording in low-light environments. The infrared (IR) LEDs automatically activate in darkness, providing up to 30 meters of visibility. Users can adjust IR sensitivity settings via the app to optimize nighttime performance. The camera also offers a “Smart IR” feature, which reduces overexposure and enhances image clarity. For customized control, the night vision mode can be manually enabled or disabled. Additionally, the app allows users to schedule IR activation based on specific time intervals. These settings ensure seamless surveillance, day or night, making the SV3C camera a reliable choice for 24/7 security monitoring.
PTZ (Pan-Tilt-Zoom) Controls
The SV3C Camera features advanced PTZ controls, allowing users to remotely adjust the camera’s angle and zoom levels for comprehensive surveillance coverage. With pan and tilt functionality, users can rotate the camera horizontally and vertically, ensuring optimal viewing angles. The zoom feature enables users to focus on specific areas, capturing detailed images even from a distance. Controls are easily accessible via the SV3C app, where users can manually adjust settings or set up automated scanning paths. This feature is particularly useful for monitoring large spaces, such as outdoor yards or business premises. The camera also supports preset positions, enabling quick switching between frequently monitored areas. Additionally, the PTZ function enhances motion tracking, ensuring smooth and precise camera movements for active surveillance needs.
Motion Detection and Alerts
The SV3C camera features advanced motion detection, enabling it to alert users of potential activity within its field of view. This function is customizable, allowing users to adjust sensitivity levels to minimize false alerts. When motion is detected, the camera sends notifications via the app, ensuring real-time monitoring. Users can also set up specific alert zones, focusing on critical areas like entry points or valuables. Recorded clips of motion events are stored locally or in the cloud, depending on the selected storage settings. The system is designed to enhance security by providing immediate notifications and evidence of events, making it a reliable tool for home or outdoor surveillance.
- Customizable sensitivity to reduce false alerts
- Real-time notifications via the SV3C app
- Adjustable motion zones for focused monitoring
- Event recording and storage options
Cloud Storage and Recording Options
The SV3C Camera offers flexible cloud storage solutions, allowing users to store footage securely online. By subscribing to the SV3C Cloud service, you can access recorded videos remotely and enjoy enhanced storage capacity. The camera also supports local recording via a microSD card, providing an alternative for offline storage. Through the app, users can customize recording settings, such as motion-triggered or scheduled recording, and easily view or download stored footage. Cloud storage ensures your videos are safe even if the camera is damaged or disconnected. The SV3C Cloud app simplifies management of recordings, offering a user-friendly interface to organize and retrieve your videos efficiently. This feature is ideal for long-term monitoring and peace of mind.
Two-Way Audio and Microphone Settings
The SV3C camera features two-way audio, enabling real-time communication through its built-in microphone and speaker. Users can speak to visitors or pets remotely via the app. To activate this feature, open the app, navigate to the camera’s settings, and enable the two-way audio option. Adjust microphone sensitivity and speaker volume for optimal clarity. Ensure the camera is connected to a stable network for uninterrupted communication. Regularly update the app to maintain this feature’s functionality. This feature enhances security and convenience, allowing users to interact with their environment remotely. Proper configuration ensures clear audio transmission, making it a valuable tool for home or outdoor surveillance.
Customizing Notification Preferences
Customizing notification preferences on the SV3C camera allows users to tailor alerts to their specific needs. Through the app, users can enable or disable notifications for motion detection, ensuring they only receive alerts that matter. The camera supports adjustable sensitivity settings, reducing false alerts from minor movements. Users can also set up notification schedules, choosing specific times to receive alerts. Additionally, the app allows customization of notification types, such as distinguishing between motion and sound detection. For enhanced privacy, users can mute notifications during certain periods or disable them entirely for selected cameras. These features ensure a personalized and efficient alert system, keeping users informed without overwhelming them with unnecessary notifications.
Advanced Configuration
Advanced settings allow users to fine-tune motion zones, schedule recordings, adjust sensitivity, and enable privacy masking for customized security monitoring and enhanced functionality.
Setting Up Motion Zones
Setting up motion zones on your SV3C camera allows you to customize the areas you want to monitor for movement. This feature helps reduce false alerts by focusing on specific regions, such as doorways or driveways. To configure motion zones, open the SV3C Cloud app and navigate to the camera’s settings. Select the “Motion Detection” option and choose “Custom Zones.” Use the grid tool to draw and adjust the zones on the live view. You can set multiple zones and adjust sensitivity levels for each to ensure accurate detection. This feature is particularly useful for outdoor cameras to ignore irrelevant movements, such as trees swaying or small animals. Properly configured motion zones enhance the camera’s effectiveness in alerting you to important events.
Configuring Scheduled Recording
To configure scheduled recording on your SV3C camera, follow these steps:
- Open the SV3C Cloud app and navigate to the Settings menu.
- Select Recording Settings and then choose Scheduled Recording.
- Set your desired recording schedule by selecting specific days and times.
- Ensure your camera has sufficient storage by checking the micro SD card or enabling cloud storage.
- Save your settings and verify the schedule is activated.
This feature allows you to automate recordings, ensuring your camera captures footage during specified periods, enhancing your security setup.
Adjusting Sensitivity Settings
Adjusting the sensitivity settings on your SV3C camera allows you to customize motion detection alerts and recording triggers. Open the SV3C Cloud app, navigate to the camera settings, and locate the sensitivity adjustment slider. Lower sensitivity reduces false alerts from minor movements, while higher sensitivity detects even slight motions. You can also schedule sensitivity adjustments or set custom thresholds for specific times of the day. Additionally, enable motion zones to focus on critical areas, ignoring others to minimize unnecessary notifications. Regularly test and refine these settings to ensure optimal performance for your security needs. This feature enhances the camera’s ability to adapt to your environment, providing reliable monitoring and alerts.
Enabling Privacy Masking
Privacy masking on the SV3C camera allows users to conceal sensitive areas within the video feed, ensuring protection of personal or private spaces. To enable this feature, access the camera settings through the app, navigate to the “Advanced Settings” section, and select “Privacy Masking.” From there, you can draw or adjust masks over specific regions on the live view. These masks will remain active in both live footage and recorded videos, providing an additional layer of security and compliance with privacy standards. This feature is particularly useful for areas like windows, neighbor properties, or sensitive indoor spaces. Ensure your camera’s firmware is up-to-date for optimal functionality of privacy masking.
Troubleshooting and Maintenance
The SV3C camera may experience connectivity issues or firmware glitches. Regular updates, restarting, and lens cleaning can resolve most problems. Always check for software updates and clean the camera lens regularly to maintain optimal performance and longevity.
Resolving Connectivity Issues
Connectivity issues with the SV3C camera can often be resolved by checking the network connection and ensuring the camera is properly configured. First, verify that the camera is powered on and within range of your Wi-Fi network. Restart the camera and router to refresh the connection. If issues persist, check the network cable or Wi-Fi signal strength. Ensure the app is installed correctly and updated to the latest version. Reinstalling the app or resetting the camera to factory settings may also resolve connectivity problems. For further assistance, refer to the user manual or contact customer support for detailed troubleshooting guides and firmware updates.
Updating Firmware
Regular firmware updates are essential to ensure your SV3C camera performs optimally. To update, visit the official SV3C website and download the latest firmware version compatible with your camera model. Connect your camera to a stable network and access the device through the SV3C Cloud app. Navigate to the settings menu, select “Firmware Update,” and follow the on-screen instructions to complete the process. Always use the official website or app to download updates to avoid security risks. After updating, restart your camera to apply the changes. Keeping your firmware up-to-date ensures improved functionality, enhanced security, and access to new features.
Resetting the Camera to Factory Settings
Resetting the SV3C camera to factory settings is a straightforward process that restores the device to its original configuration. To perform a factory reset, locate the small reset button on the camera’s body, typically found near the power port. Press and hold this button for 10-15 seconds until the camera’s LED indicator flashes. Release the button, and the camera will reboot, erasing all custom settings and configurations. Alternatively, you can reset the camera via the SV3C Cloud app by navigating to the settings menu, selecting “Factory Reset,” and following the on-screen instructions. After the reset, the camera will return to its default state, requiring you to set it up again as if it were new. This process is useful for troubleshooting or preparing the camera for transfer to a new user.
Cleaning and Maintaining the Camera
Regular cleaning and maintenance are essential to ensure the SV3C camera functions optimally. Use a soft, dry cloth to wipe the lens and housing to prevent dust buildup. Avoid harsh chemicals or abrasive materials that may damage the camera’s surface. For outdoor models, check for debris like leaves or moisture and clean as needed. Store the camera in a dry, cool environment when not in use. Periodically inspect the power cord and connections for wear or damage. Updating the firmware regularly also helps maintain performance. For detailed cleaning instructions, refer to the SV3C camera manual or visit their official website for guidance.
- Use a microfiber cloth for lens cleaning.
- Avoid exposure to extreme temperatures.
- Ensure proper ventilation to prevent moisture buildup.

Additional Information
For additional resources, visit the SV3C website to download manuals, apps, and QR codes. Customer support is available for any assistance or troubleshooting needs.
Downloading the SV3C Camera App
To get started with the SV3C Camera, download the SV3C Cloud app, available for both iOS and Android devices. Simply search for “SV3C Cloud” in the App Store or Google Play Store. Alternatively, scan the QR code provided in the camera’s user manual or packaging to directly access the download page.
The app allows you to configure the camera, view live footage, and manage settings. Ensure your device is connected to the internet before downloading. For more detailed instructions, visit the official SV3C website at www.sv3c.com.
Viewing Live Footage and Recorded Videos
To access live footage from your SV3C camera, open the SV3C Cloud app and select the camera from the device list. Live video streams in HD quality, allowing real-time monitoring. For recorded videos, navigate to the “Playback” or “Recordings” section within the app. Videos are stored locally on an inserted micro SD card or via cloud storage, depending on your setup. You can play, pause, rewind, or delete recordings directly through the app. The SV3C Cloud app also supports remote access, enabling you to view footage from anywhere with an internet connection. This feature ensures convenience and peace of mind for monitoring your property.
- Live footage is accessible in real-time through the app.
- Recorded videos can be viewed, managed, and deleted via the app.
- Remote access allows monitoring from any location with internet.
Understanding the User Manual
The SV3C camera user manual is an essential guide for setting up and utilizing the camera’s features effectively. It provides detailed instructions on installation, configuration, and troubleshooting, ensuring users can maximize the camera’s capabilities. The manual covers topics such as app installation, network connectivity, and advanced settings like motion detection and privacy masking. Available for download on the SV3C website, the manual is accessible in multiple languages, including English, German, and Italian. It also includes QR codes for easy app downloads and setup. Whether you’re a first-time user or looking to optimize your camera’s performance, the manual serves as a comprehensive resource to address all your questions and needs.
Customer Support and Resources
For any questions or issues regarding the SV3C camera, customers can access a variety of support resources. The official SV3C website (www.sv3c.com) offers detailed user manuals, software downloads, and setup guides. Additionally, the SV3C Cloud app is available for download on both iOS and Android platforms, providing step-by-step installation instructions and troubleshooting tips. Users can also scan the provided QR code to directly access the app download page. Furthermore, video tutorials and FAQs are available online to assist with camera configuration and maintenance. For personalized assistance, customers can contact the SV3C support team through email or the contact form on their website, ensuring prompt resolution of any technical difficulties.
The SV3C Camera offers reliable performance, ease of use, and advanced features, making it a top choice for home and outdoor surveillance needs, providing peace of mind.
Final Thoughts on the SV3C Camera
The SV3C Camera stands out as a reliable and feature-rich security solution, offering excellent value for its price. With its robust HD video quality, night vision capabilities, and motion detection, it provides comprehensive surveillance for home and outdoor settings. The two-way audio feature and user-friendly app controls enhance its functionality, making it ideal for both novice and experienced users. The detailed user manual and straightforward setup process ensure a seamless experience. While minor connectivity issues can occur, they are easily resolved with troubleshooting steps. Overall, the SV3C Camera is a solid choice for anyone seeking an affordable yet high-performance security camera.
Recommendations for Optimal Use
For optimal performance, ensure the SV3C camera is positioned in an area with a clear view and reliable Wi-Fi connectivity. Regularly update the app and firmware to access the latest features and security patches. Adjust motion sensitivity settings to minimize false alerts and customize notification preferences for relevant updates. Use the two-way audio feature for real-time communication and enable cloud storage for secure video backups. Periodically clean the camera lens to maintain video clarity and check network settings to avoid connectivity issues. Refer to the user manual for detailed instructions and explore additional resources on the SV3C website for advanced configurations and troubleshooting tips;